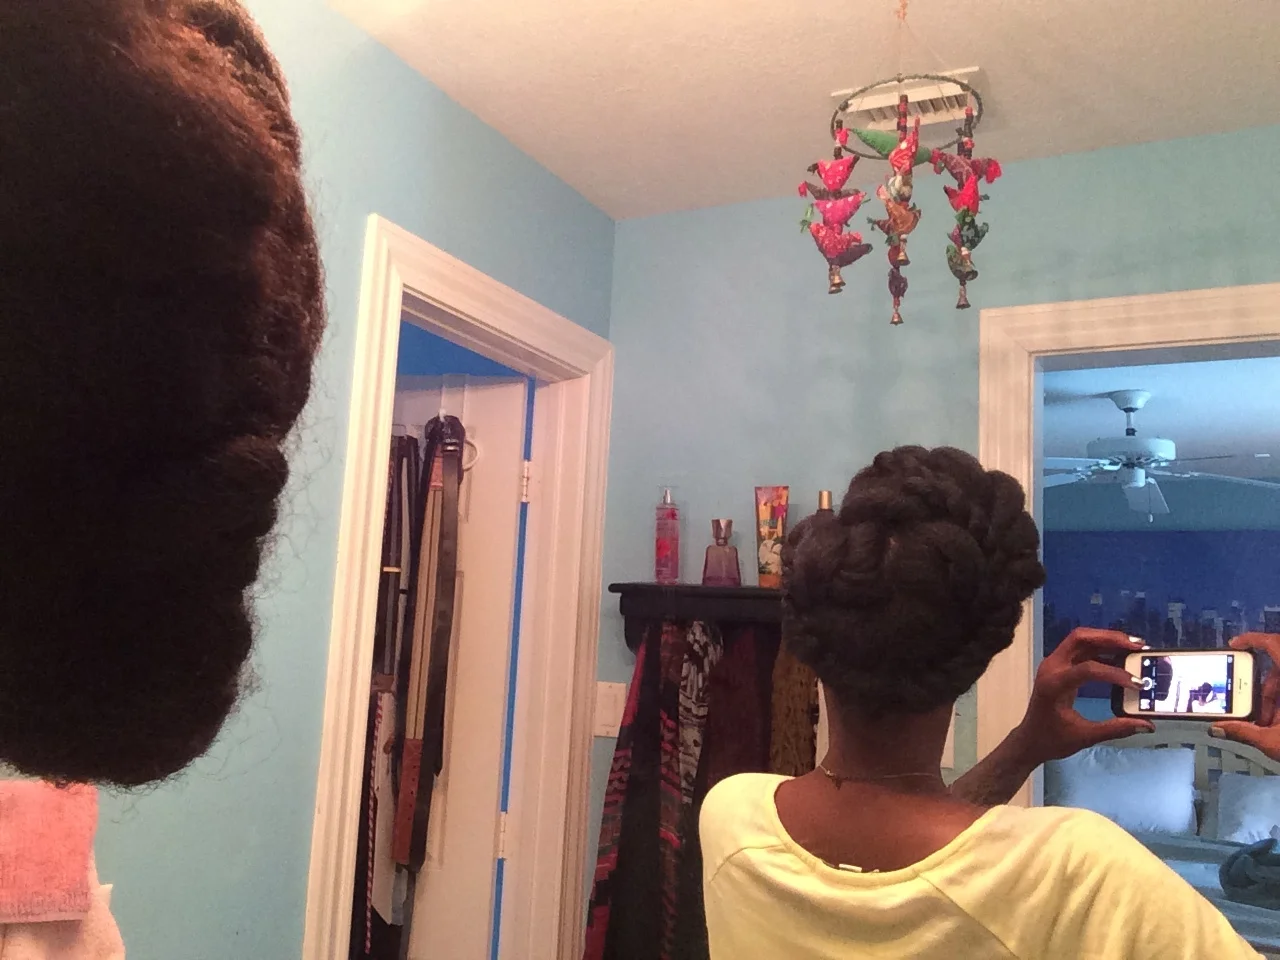
Natural Hair How-To: Protective Style Two Strand Twist Updo
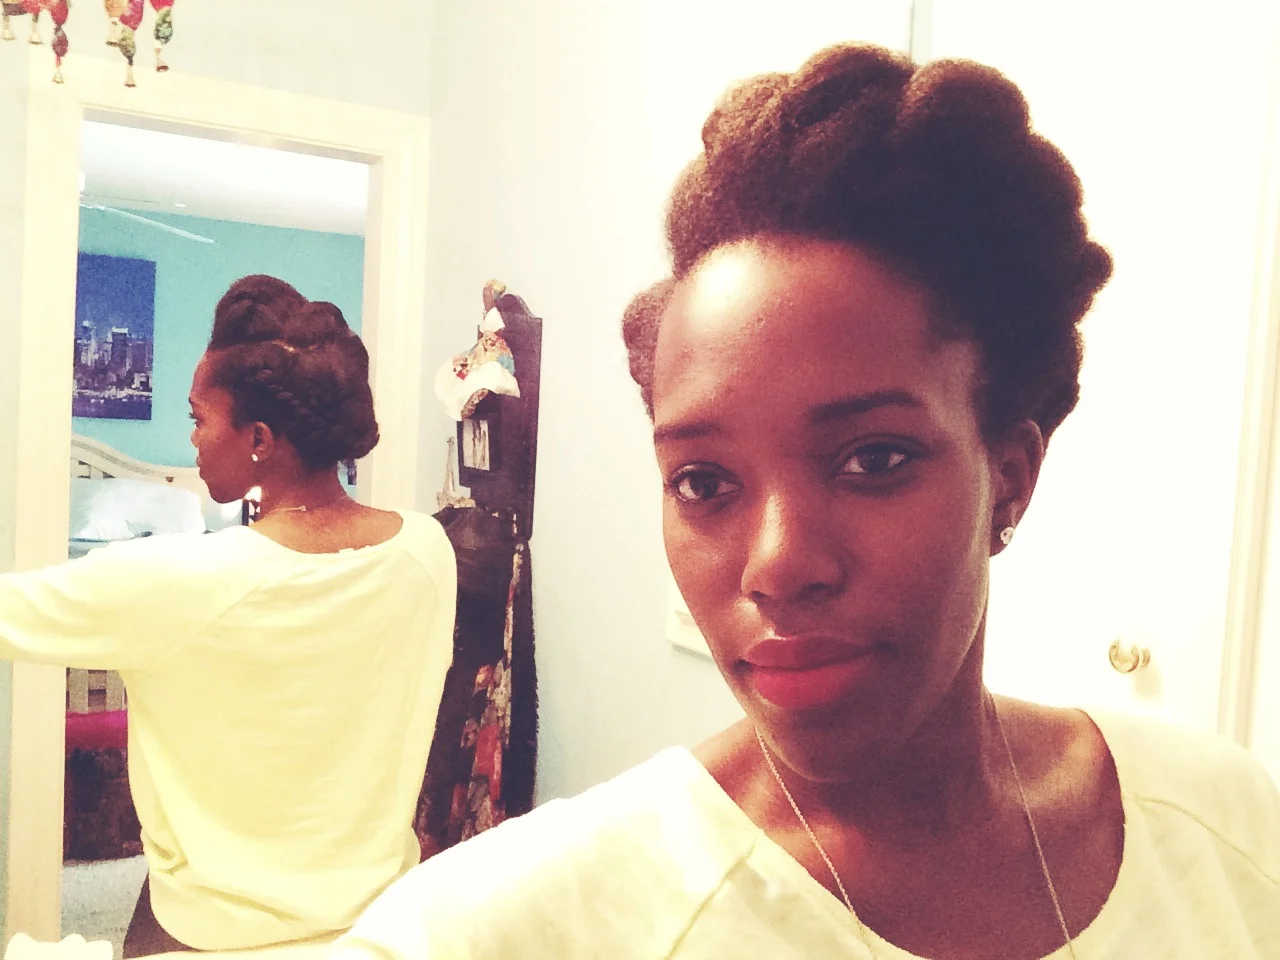
Hey guys! It's the funniest thing how it seems that the most random of hairstyles draw the most attention. I was hoping to get my hair braided to give it a break from all the maintenance, but it fell through and and this style is what I came up with as a replace for a protective look.
Ironically, I've been getting stopped. A lot lol And I've had quite a few people tell me that they'd --never be able to do something like this. Lies! It's SO easy that I wanted to do a quick how-to!
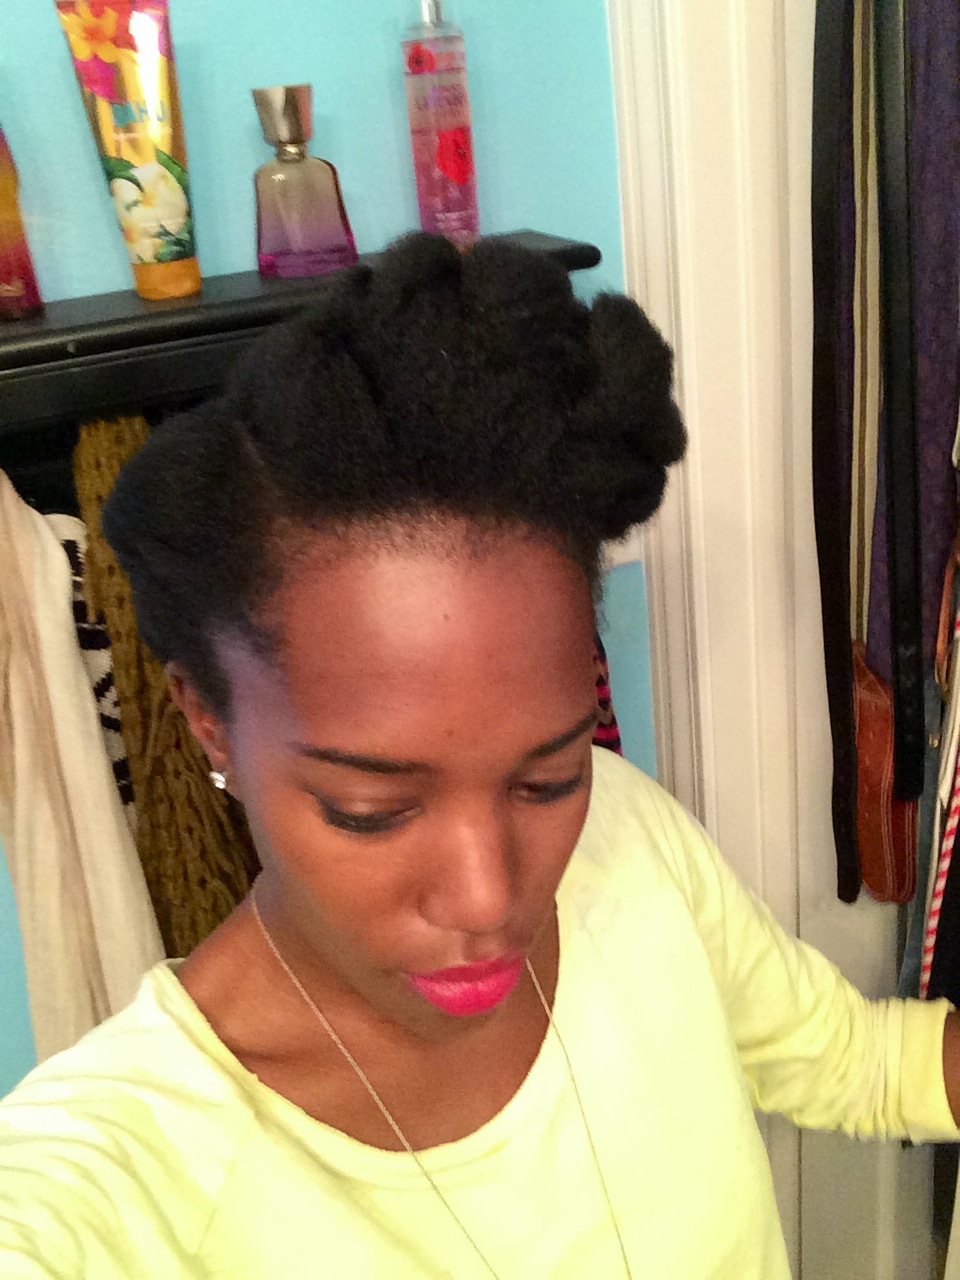
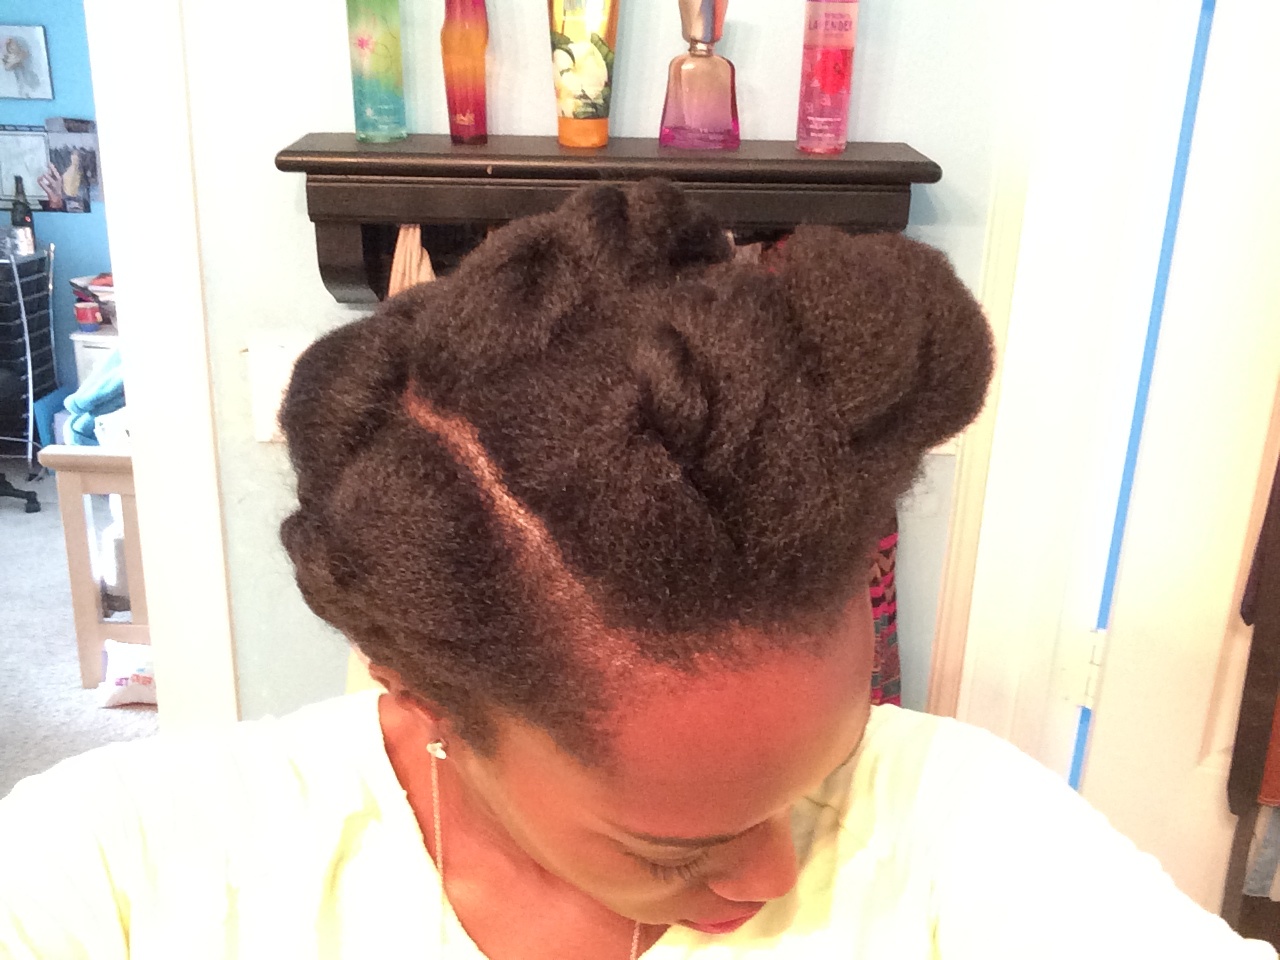
Step 1: Section off the hair. There are three ways that I typically stretch my hair: blow dry, flat-iron or bantu knot. In the case of this style, I had just washed my hair so I had already blow dried it, and it was already paired off into sections. I generally split my hair into 10-12 sections of two strand twists and I determine the part based on whichever way I want the style to fall.
Step 2: Stretch and/or smooth the section. I flat-ironed each two strand twist from the root to about halfway to the end of the section. I did this because whoever is braiding my hair moves a lot faster with the hair smooth at the root. *Feel free to skip this step, but I will add that I've really liked watching the style progress from a more sleek look to a more textured look due to the rain we've been having over the last few days. It's like two styles in one ;-)
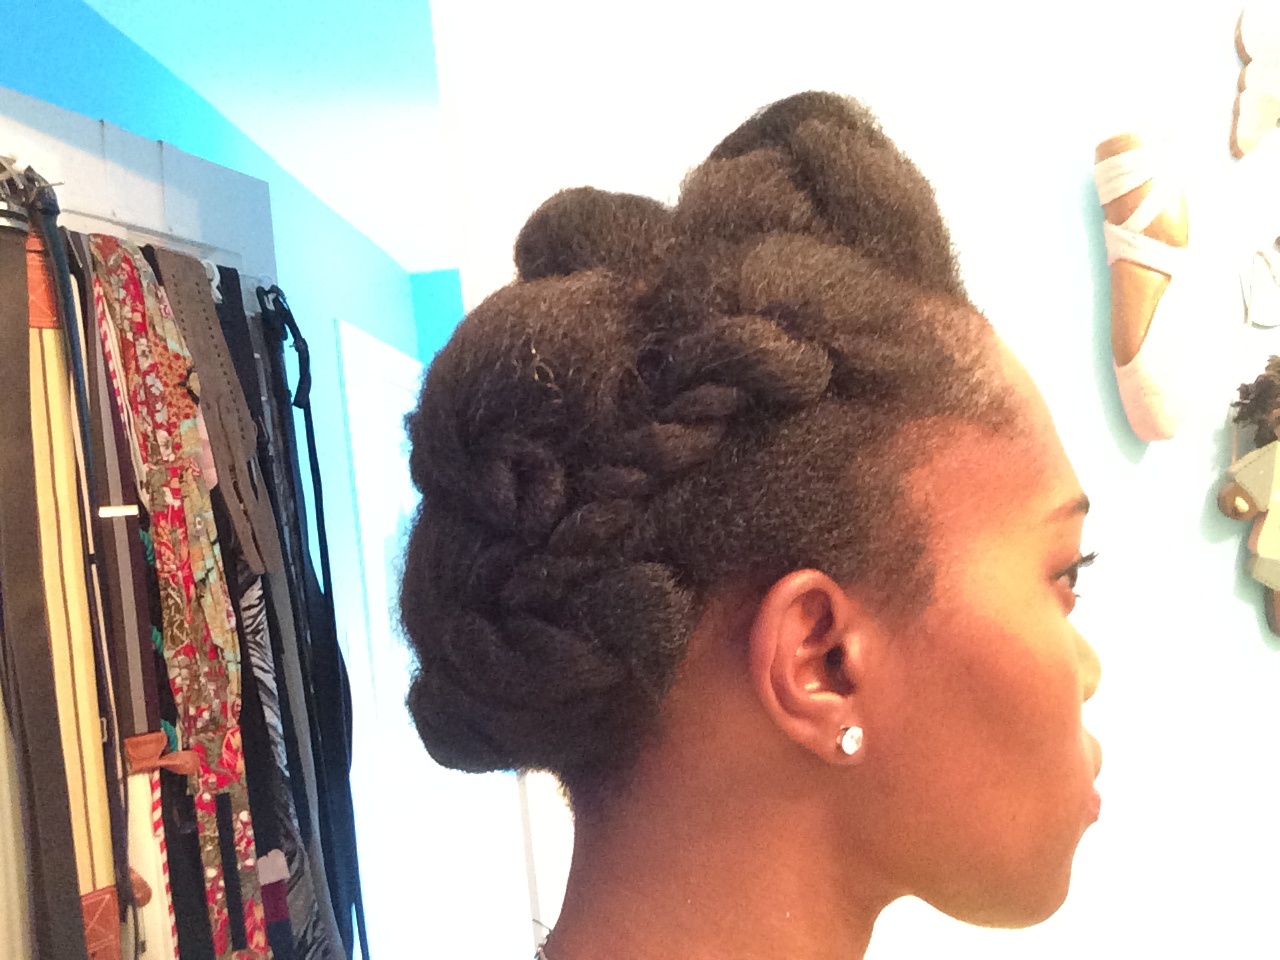
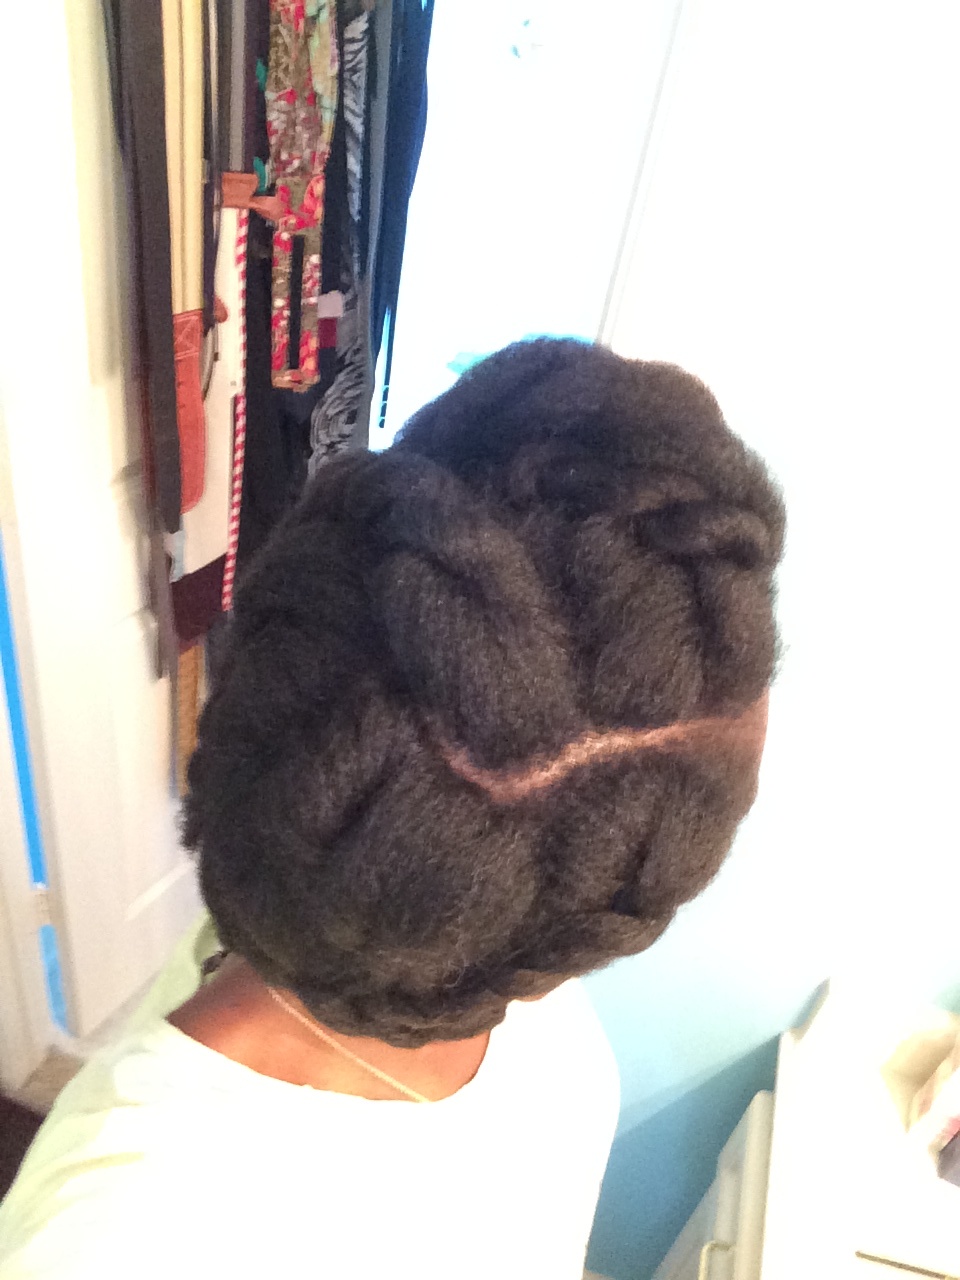
Step 3: Twist, Tuck & Roll. So at this point there are 12 sets of two strand twists. To get the crown affect, decide which side you want to work on first and have you bobby pins ready. Then twist the two strand twists with the next two strand twist section, working your way towards the nape of your neck and pin at the center. Repeat the same motion on the other side adjusting accordingly moving down towards the nape of your neck and pin.
Step 4: Final Tuck. At this point, you may have a little hang-time at the nape of your neck from the two sides. I generally tuck each piece into the opposite side and pin.
*Disclaimer: This is my first how-to so please don't hesitate to ask whatever questions or offer suggestions that may be helpful. I'll definitely take more photos of the process and even record a quick video so you guys can have more visual aids!
I hope this was helpful! Have a great week!
Peace, Love & Sunshine ~ Chels